Mushroom Growing Tips & Grow Kit Guides
Your Homegrown Path to Fresh Food, Flavor, and Food Freedom
Mushrooms are more than ingredients. They are teachers, connectors, and tools for resilience. From the forest floor to your kitchen counter, mushrooms show us how to grow, share, and eat with intention.
This guide is packed with everything you need to know to get started with homegrown mushrooms, maximize their flavor and nutrition, and even expand outdoors to build ongoing harvests.

1. Why Mushrooms Matter
Most store-bought mushrooms are already a week or more old when you bring them home. Flavor fades, texture declines, and nutrients diminish. When you grow mushrooms at home, you control freshness, nutrition, and taste.
Homegrown mushrooms:
- Are harvested at their peak, ensuring maximum enzymes, antioxidants, and
- aroma compounds
- Taste rich and umami-forward because they are alive until cooked
- Contain nutrients like beta-glucans, ergothioneine, and B vitamins that degrade quickly in older mushrooms
Growing mushrooms is also about food sovereignty. Even a small home harvest reduces dependence on grocery supply chains, teaches skills to your family, and can extend to outdoor cultivation for months or years of continuous yield.

2. Cooking Mushrooms Like a Chef
Fresh mushrooms are transformative in the kitchen, but they need proper handling:
Sautéed Pink Oyster Mushrooms
- Start Dry: Heat your pan without oil. Mushrooms release moisture,
- concentrating flavor.
- Season Smart: Add salt, pepper, and spices like smoked paprika after the
- initial cook-down to build layered flavor.
- Sear for Texture: Once golden edges appear, add butter or oil. Let them sear
- undisturbed for the perfect crisp edge.
- Finish with Aromatics: Garlic, herbs, lemon juice, or red pepper flakes elevate
- the dish.
Serving Ideas
- On sourdough toast
- Tossed into pasta
- As a crunchy salad or grain bowl topper
- Simply as a gourmet side dish
Chef Tips for Any Mushroom
- Use a wide pan and high heat to avoid steaming
- Avoid overcrowding the pan
- Minimal stirring preserves crust and texture
- Salt and fat should be balanced
- Cut mushrooms to suit the dish: thick for mains, diced for risotto, whole caps for roasting
Quick Tip: Fresh mushrooms will brown faster, smell richer, and retain their texture better than any store-bought variety.

3. Weekly Harvest Cycles and the ShroomBag System
The ShroomBag 4-Pack is designed for rotating harvests, giving you fresh mushrooms every week. Each bag produces 1.5–2 lbs over 2–3 flushes. Stagger your bags for continuous supply and maximum freshness.
This system builds:
- Consistency: Weekly kitchen harvests
- Savings: More mushrooms for less money than retail
- Skill: Easy introduction to growing and managing a small food system
- Expansion Potential: Prepare for outdoor cultivation after indoor cycles finish

4. Expanding Outdoors for Long-Term Harvests
When your indoor yields slow, the fully colonized ShroomBag can seed outdoor beds, multiplying your harvest.
Methods:
Straw or Hay Bucket
- Pour boiling water over straw, let drain and cool
- Drill small holes in a bucket
- Layer broken-up ShroomBag substrate and straw in a bucket and put on the
- lid
- Place in a shaded, moist area and 2-3 weeks wait for mushrooms to appear
- Log Inoculation• Drill holes evenly across a log
- Fill with substrate (can use a log inoculating tool to pelletize substrate)
- Seal with beeswax and place in a shaded area
- Water periodically to maintain log moisture
Mulch Bed Expansion Method (1)
- Choose Your Spot: Find a shaded, moist area in your garden or yard. Ideal spots are under trees, along garden edges, or in existing mulch beds.
- Prepare the Bed: Loosen the soil slightly and add a 2–3 inch layer of straw, wood chips, or leaf mulch. This creates a hospitable environment for mycelium to spread.
- Inoculate: Break your fully colonized ShroomBag into chunks. Scatter the pieces evenly across the mulch bed.
- Cover and Moisturize: Add another 1–2 inch layer of mulch on top and lightly water to keep the bed damp but not soggy.
- Wait and Watch: Over the next few weeks, white mycelium threads will
- spread through the mulch. Mushrooms should start fruiting once the substrate is fully integrated and conditions are right.
Mulch Bed Expansion Method (2)
- Choose Your Spot: Find a shaded, moist area in your garden or yard. Ideal
- spots are under trees, along garden edges, or in existing mulch beds.
- Prepare the Bed: Loosen the soil slightly and add a 2–3 inch layer of straw,
- wood chips, or leaf mulch. This creates a hospitable environment for mycelium
- to spread.
- Inoculate: Break your fully colonized ShroomBag into chunks. Scatter the
- pieces evenly across the mulch bed.
- Cover and Moisturize: Add another 1–2 inch layer of mulch on top and lightly water to keep the bed damp but not soggy.
- Wait and Watch: Over the next few weeks, white mycelium threads will spread through the mulch. Mushrooms should start fruiting once the substrate is fully integrated and conditions are right.
Benefits of Outdoor Expansion
- Bigger yields, exceeding indoor harvests
- Low maintenance with natural shade and humidity
- Potential for future crops in the following year
- Minimal additional cost or effort

5. Freshness and the Science of Mushrooms
A mushroom continues living after harvest. Oxygen enters, moisture leaves, and enzymes break down cell walls. These chemical changes affect flavor, texture, and nutrient density within days.
Home-grown mushrooms:
- Retain full enzymatic and aromatic activity
- Deliver optimal beta-glucans, antioxidants, and B vitamins
- Taste vibrant, fresh, and alive
Try cooking one immediately after harvest and one week(s) old from the store to see the difference in browning, aroma, and texture. Compare that to supply-chain mushrooms you’re used to.

6. Mycelium: Nature’s Network
Beneath our feet runs a living network older than human history: mycelium.
- Connects plant roots, moves nutrients, and signals
- Demonstrates efficiency, adaptability, and cooperation
- Expands in fractal patterns that mirror galaxies, rivers, neurons, and even our own social networks
- Every ShroomBag brings this living logic into your home. Watching white threads spread through the substrate is a glimpse of a living system solving itself, teaching efficiency, resilience, and interconnection.
Lesson: Mycelium is regenerative. It doesn’t just sustain life. It creates more life. You can mirror this in your kitchen, garden, and community.

7. Family, Food, and Connection
Growing mushrooms at home is about more than nutrition. It is about ritual, memory, and learning.
- Assign small tasks to children like washing vegetables or tearing
- mushrooms
- Talk about food origin: garden, market, forest
- Build traditions: cook together on Fridays, make Sunday breakfast a family occasion to look forward to
Hands-on growing fosters:
- Pride in contribution
- Connection to the food system
- Appreciation for fresh, living food

8. Your $27 Investment in Food Freedom
- Indoor harvest: 1.5–2 lbs per bag
- Outdoor potential: Multiple extra pounds per bag
- Savings: Beats grocery store prices on premium mushrooms
- Skills: Self-reliance, kitchen confidence, family learning.
- One kit can turn into years of fresh mushrooms, teach lifelong lessons, and build a foundation for ongoing outdoor harvests.
9. Bringing It All Together
Mushrooms teach patience, observation, and connection. They are:
- Food: Delicious, nutritious, and fresh
- Science: Living chemistry and fractal networks
- Tradition: Family meals, shared memories, and hands-on learning
- Self-Reliance: Skills, savings, and food sovereignty
The ShroomBag is your gateway. Start small, learn fast, harvest often, and expand outdoors to create a living, growing system that supports your kitchen, your family, and your values.
Next Steps:
- 1. 2. 3. 4. Start your indoor ShroomBag harvest
- Build a weekly rotation for continuous fresh mushrooms
- Expand outdoors when ready for long-term yield
- Share, teach, and enjoy the process of growing your own food
Mushrooms are not just food. They are life, learning, and abundance

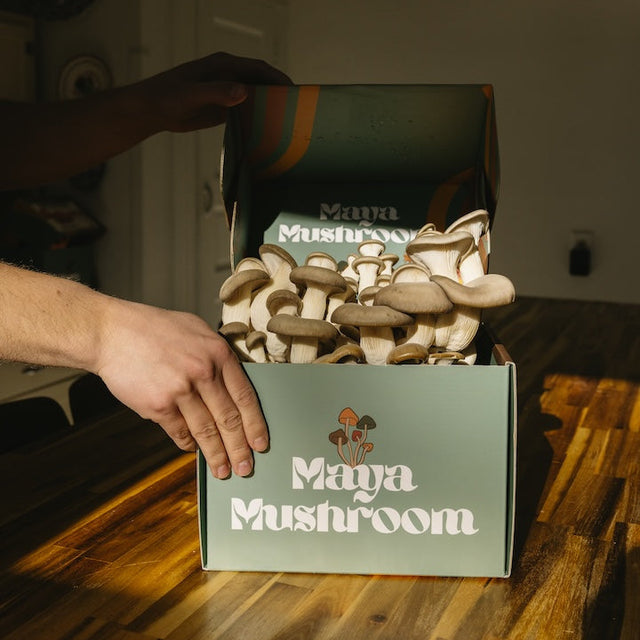
Lion's Mane and Oyster Mushroom Grow Kits: Everything You Need to Know Before Your First Harvest
There's something magical about growing your own mushrooms. Unlike traditional gardening, you don't need soil, sunlight, or even a green thumb. Just a small corner of your kitchen counter and about a minute a day.
I'll be honest: when I first heard about mushroom grow kits, I was skeptical. How could a block of compressed sawdust produce restaurant-quality mushrooms in my apartment? But after watching my first oyster mushrooms double in size overnight, I became a complete convert.
If you're curious about growing lion's mane or oyster mushrooms at home, this guide covers everything I wish someone had told me before I started.
Key Takeaways
If you only remember three things from this guide, make it these:
- Mushroom growing is easier than keeping most houseplants alive. You need just a spray bottle, indirect light, and one minute a day. No soil, no special equipment, no green thumb required.
- Start with oyster mushrooms for quick wins, then graduate to lion's mane. Oysters grow fast (7–14 days) and forgive beginner mistakes. Lion's mane takes slightly longer but offers that gourmet seafood flavor and brain-boosting benefits.
- Humidity is everything. Most failures happen because the block dries out. Mist 2–3 times daily until you see tiny water droplets on the surface of the "ceiling" (the upper inside of the box), and you're 90% of the way to success.
Why Mushroom Kits Are Perfect for Beginners

Here's what surprised me most: mushrooms are easier to grow than most houseplants. They don't need soil. They thrive in indirect light. And unlike that fiddle leaf fig gathering dust in your corner, mushrooms actually want to grow.
A mushroom grow kit is essentially a fully colonized block of mycelium (the living underground network that produces mushrooms.) Once you open the bag and expose it to fresh air and moisture, the mycelium springs into action, producing those beautiful fruiting bodies you'll harvest and cook.
What to expect from your first grow:
- First harvest: 7–14 days after opening
- Total harvests: Usually 2–3 (called "flushes")
- Daily care: 2–3 mistings with a spray bottle
- Space needed: Just a kitchen counter or shelf
The process is surprisingly forgiving. Mist your ShroomBag a few times daily, keep it in indirect light, and wait. That's really it.
Lion's Mane vs. Oyster Mushrooms: Which Should You Choose?
This is the question everyone asks, and honestly, both are excellent choices for beginners. But they offer completely different experiences.
Oyster mushrooms are the sprinters of the mushroom world. They grow fast, sometimes visibly overnight once they start pinning. They're incredibly forgiving of less-than-perfect conditions, and they have that classic umami-rich, meaty flavor that works in everything from stir-fries to pasta. If you want quick results and a confidence boost, start here.
Lion's mane is more of a patient artist. It takes longer (10-14 days typically), requires slightly more consistent humidity, and grows as a single, stunning white pom-pom rather than clusters. But the reward? A delicate, seafood-like flavor that's genuinely unique, plus the cognitive health benefits that have made it famous in the wellness world.
My recommendation: Start with oyster mushrooms for your first kit. They're faster, more forgiving, and incredibly satisfying. Once you've got a successful harvest under your belt, graduate to lion's mane for the gourmet upgrade.
The Three Things That Actually Matter

After growing dozens of mushroom blocks, I've learned that success comes down to three environmental factors. Get these right, and you're virtually guaranteed a flush.
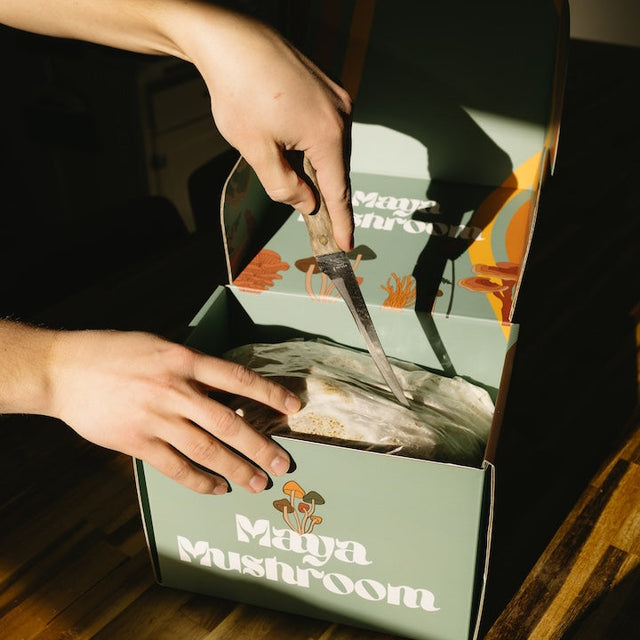
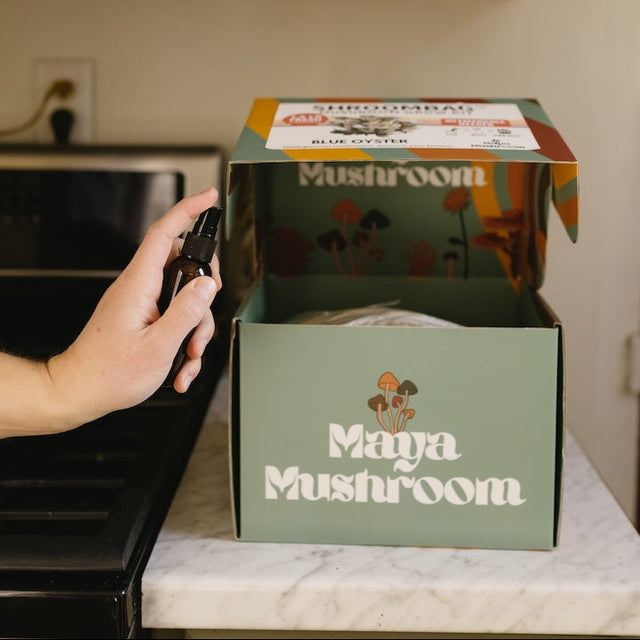
1. Humidity (The Most Important Factor)
Mushrooms are about 90% water, so they need constant moisture to develop. Your goal is to keep the inside of the ShroomBag humid.
Fold the lid into a triangle roof over your bag. Mist the inside of that ceiling 2-3x a day, not the mushrooms themselves. Mushrooms love humid air, not standing water.
2. Fresh Airflow
Mushrooms breathe oxygen and release CO2, just like us. Stagnant air and high CO2 leads to weird, elongated growth. Lift the lid completely when you mist so fresh oxygen gets in. That's the whole system.
The Mistakes Everyone Makes (and How to Avoid Them)
Giving up too early: The first week often feels like nothing is happening. Then suddenly, tiny pins appear seemingly overnight. Be patient, growth is happening underground before you see it above.
Letting the block dry out: If the surface looks dry and crusty, you've waited too long between mistings. Increase your misting frequency and consider misting the substrate.
Harvesting too late: Pick oyster mushrooms just before the caps start to flatten and curl upward. For lion's mane, harvest when the "teeth" are about an eighth-inch long. Waiting too long results in tough, less flavorful mushrooms and a mess of spores.
Overthinking it: This is the big one. Mushroom growing is remarkably simple, but we tend to complicate it. Follow the instructions that come with your kit, maintain humidity, and trust the process.
What Happens After Your First Harvest?

Here's the beautiful part: after you harvest your first flush, the mycelium rests for about a week, then produces another round of mushrooms.
Just flip the bag 180 degrees and start over. (the flat bottom side of the bag for third flush) Most kits will give you 2–3 harvests before the block is spent.
Between flushes, keep misting to prevent the block from drying out completely, but don't stress about perfect conditions during the rest period.
After your final harvest, the spent block makes excellent compost or mulch for outdoor gardens. Some people even bury spent blocks in their yard and get surprise mushrooms months later. It's worth it to expand spent substrate in hay, straw, or wood chips for more mushrooms at little to no extra cost.
Quick Answers to Common Questions
Q: Do I need special equipment?
A: Just a spray bottle. That's it. One is included with every ShroomBag
Q: What if nothing grows?
A: Give it time. Most kits take 7–10 days before visible pins appear. If it's been 30 days with no luck even if you followed the directions, we'll replace your ShroomBag for free.
Q: Can I grow mushrooms in a small apartment?
A: Absolutely. A single kit takes up less space than a shoebox.
Q: Are homegrown mushrooms safe to eat?
A: Yes. Grow kits from reputable suppliers contain only edible species. Always cook your mushrooms for the best flavor and nutrition.
Q: How do they taste compared to store-bought?
A: Incomparably better. Fresher, more flavorful, and with a texture that store-bought mushrooms rarely achieve.
Why This Matters More Than You Think
Growing your own mushrooms is more than just a kitchen project. It's a small act of food independence. It's watching biology happen in real-time on your counter. It's serving something at dinner that you grew yourself and watching people's faces light up.
After your first successful harvest, when you're sautéing mushrooms you grew yourself in butter and garlic, something shifts. You start looking at those grocery store packages differently. You start wondering what else you could grow.
That's the real gift of mushroom cultivation. Not just the food, but the curiosity and connection it sparks.
So grab a ShroomBag, find a spot on your counter, and prepare to be amazed at what a little block of mycelium can do. Your first harvest is only a few weeks away.

The Golden Oyster Mushroom (Pleurotus citrinopileatus) is stunning. Bright yellow caps, fast growth, and eye-catching clusters make it a favorite among home growers. But beneath that beauty is a growing concern among ecologists and experienced cultivators. This species does not belong here.
A Beautiful Invader
Originally from Eastern Asia, the Gold Oyster has spread across North America in recent years through both intentional cultivation and accidental escape. While it is prized for its color and mild flavor, the problem is not how it tastes. The problem is how it behaves once it gets outside.
Unlike other oyster mushrooms, P. citrinopileatus is unusually aggressive. It breaks down wood using a set of enzymes called laccases, which specialize in oxidizing phenolic compounds. This allows it to colonize hardwoods faster than native fungi, especially those weakened by pests or environmental stress.

The Perfect Storm: Gold Oyster Meets Ash Trees
In North America, the Gold Oyster has found an almost perfect partner in ash trees. After the emerald ash borer wiped out millions of these trees, their dead wood became an open invitation for decay fungi. Most native decomposers take time to move in. Gold Oyster does not wait.
Its laccase-heavy attack quickly clears away natural fungal inhibitors in wood. This allows it to dominate early and block native species from re-establishing. Researchers tracking wild Gold Oyster sightings found that over 70 percent of reports occur in areas with high ash mortality. This suggests the species is spreading along the same paths left by emerald ash borer destruction.
Displacing Native Fungi
This rapid colonization means Gold Oyster can outcompete local decomposers, reducing the diversity of fungi that once maintained healthy forest recycling cycles. In simple terms, it is throwing off the balance of who gets to eat the dead wood. This ripple effect can reach insects, soil microbes, and tree regeneration.
Native oyster species like Pleurotus pulmonarius and Pleurotus ostreatus decompose wood more slowly and cooperatively, leaving room for other organisms to share the habitat. Gold Oyster, by contrast, tends to take over and leave little behind but a monoculture of its own fruiting bodies.

Why Cultivation Makes It Worse
Every time Gold Oyster is grown outdoors, even on logs or straw, there is a risk of spores escaping into the wild. Spores can travel miles through wind and water. They can land on dead or dying wood where they establish new colonies. Once it is out there, there is no realistic way to contain it.
This does not mean you should not grow mushrooms at all. Only that choosing native or regionally adapted species is the responsible path. Varieties like Lion's mane, Chestnut, and Blue/White oysters are better suited for North American ecosystems. They provide the same yield and flavor without the ecological risk.
The Bottom Line
The Gold Oyster might look like sunshine on a log, but its spread is already reshaping fungal communities across the continent. By avoiding its cultivation, growers can help protect native biodiversity and support the long-term health of local forests.
Beauty is not always harmless. Sometimes the most responsible choice is the one that lets nature keep its balance.
Harvest timing makes the difference between premium mushrooms and mediocre ones. Pick too early from your ShroomBag, and you're leaving potential yield on the substrate. Pick too late, and texture degrades, flavor weakens, and you trigger spore release that reduces future flushes.
Here's when to harvest each Maya Mushroom variety for maximum quality and yield.
Key Takeaways
- Oyster mushrooms need harvesting when caps are slightly cupped, not fully flat
- 12-24 hour window exists at peak quality before decline begins
- Lion's mane requires white teeth with no yellowing at tips
- Twist and pull technique preserves substrate health for future flushes
- Proper timing delivers 1.5-2 pounds per $29 ShroomBag across multiple harvests
Blue Oyster Harvest Indicators
Perfect timing:
- Caps slightly cupped or just beginning to flatten
- Edges clean and defined, not ragged
- Color vibrant blue-grey, not faded
- Clusters feel substantial when touched
Wait too long:
- Caps flatten completely and edges curl upward
- Spore dust appears (looks like powder)
- Texture becomes soft and spongy
Harvest window: Day 7-10 after opening ShroomBag

Pink Oyster Harvest Timing
Ready indicators:
- Vibrant coral-pink color (not fading to pale)
- Caps slightly cupped or almost flattening
- Growth rate slows
- Clusters dense and firm
Past prime signs:
- Color fades to washed-out pink
- Caps completely flat with upturned edges
- Texture becomes delicate and tears easily
- Spore release begins
Harvest window: Day 5-7 after opening, sometimes as early as Day 4
Note: Pink oyster has tighter window than blue. Check twice daily once pins appear.
Lion's Mane Harvest Signals
Perfect timing:
- White teeth/spines prominent and dense
- No yellowing or browning at tips
- Pom-pom structure tight and substantial
- Growth rate slows noticeably
Too late signs:
- Tips turn yellow or brown
- Teeth begin separating or looking sparse
- Overall yellowing spreads inward
- Texture becomes less firm
Harvest window: Day 10-14 after opening ShroomBag
Black King Oyster Timing
Ready to harvest:
- Caps 70-80% open but not completely flat
-
Thick stems fully developed
- Color consistent and vibrant
Past prime:
- Caps completely flat
- Spores dropping onto substrate
- Stem texture becomes slightly hollow
Harvest window: Day 10-14 after opening
The Twist and Pull Technique
Why it matters: Cutting leaves stem stubs that rot and cause contamination. Twisting removes entire fruiting body cleanly.
Proper method:
- Grab cluster at base where it connects to substrate
- Twist gently while pulling upward
- Entire cluster releases cleanly
- Remove all mushrooms from that area, including tiny aborts
Handle substrate gently during harvest. Be sure to get all the mushroom pieces off the substrate to reduce molding during next harvests.

Extending Value Through Multiple Flushes
After first harvest:
- Flip the bag
- Cut the other side and start again
Second flush: 7-10 days later, 60-80% of first yield Third flush: 40-60% of first yield
One $29 ShroomBag produces 1.5-2 pounds total.
Common Harvest Mistakes
Waiting for "just a little bigger": Mushrooms past prime lose more quality than you gain in size. Harvest at peak, not after.
Ignoring aborts: Those dark pins that stopped growing? Remove them. They rot if left on substrate after harvest.
Frequently Asked Questions
Q: What if I miss the harvest window? A: Mushrooms are still edible but quality declines. Texture suffers most. Use in soups or dishes where texture matters less. Or dehydrate and use as a seasoning.
Q: Can I harvest part of a cluster? A: Not recommended. Remove entire cluster at once. Partial harvesting leaves stubs that rot.
Q: How long do harvested mushrooms store? A: Pink oyster: 2-3 days. Lion's mane, Blue oyster and King oyster: 5-7 days. All refrigerated in double bagged paper bags.
Q: Does harvest timing affect second flush? A: Yes. Timely first harvest with clean removal promotes stronger second flush. Late harvest with spore release weakens subsequent yields.
Why It Matters
Harvest timing determines whether your $29 ShroomBag yields 1.2 pounds of mediocre mushrooms or 2 pounds of restaurant-quality ones. The difference is paying attention for that 12-24 hour window when everything's perfect.

Store-bought oyster mushrooms sit in plastic containers for days, losing flavor and texture before you even bring them home. Meanwhile, fresh gourmet mushrooms from your kitchen counter change everything about how food tastes and what it costs.
Key Takeaways
- ShroomBag mushrooms maintain superior texture and flavor that store varieties lose during transport
- Fresh harvest prevents rubbery consistency, keeping delicate silky texture when cooked
- Home cultivation cuts costs by 60-80% while eliminating pesticides
- Four premium varieties deliver restaurant-quality results at home
- Complete control ensures peak umami richness and earthy notes
The Freshness Gap You'll Actually Taste
The moment you harvest from your ShroomBag, those tender caps stay silky instead of turning rubbery. The earthy, nutty notes remain vibrant. When you sauté fresh Maya Mushroom oysters, they hold their shape beautifully while releasing that distinctive umami richness.
Store mushrooms travel hundreds of miles, losing subtle sweetness along the way. By the time you cook them, you're getting bland, rubbery fungi.
Store timeline: 14+ days from harvest to your plate ShroomBag timeline: Minutes from substrate to skillet
Complete Control Over Quality
When you grow ShroomBag, you know exactly what went into your substrate. Maya Mushroom uses organic hardwood sawdust and soy hauls. No pesticides. No mystery chemicals.
Store-bought mushrooms? You'll never know what substrate they grew on or what was sprayed during cultivation.

The Economics Make Sense
Store prices:
- Oyster mushrooms: $20-25 per pound
- Lion's mane: $30-35 per pound
- King oyster: $22-28 per pound
ShroomBag reality:
- Kit cost: $29
- Yield: 1.5-2 pounds
- Your cost: $14.50-19.33 per pound
You're cutting mushroom costs by 60-80% while getting fresher, better-tasting results.
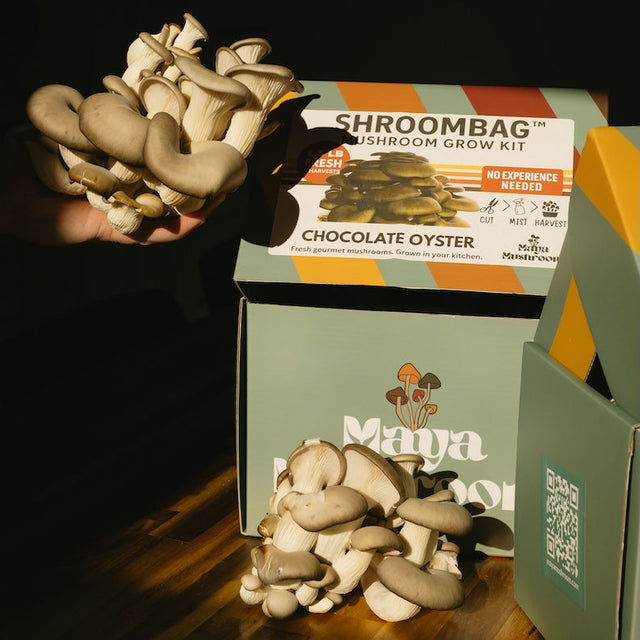
Four Varieties That Deliver (more to come)
Blue Oyster: Temperature tolerant (60-75°F), reliable, perfect for beginners
Pink Oyster: Fast growth (5-7 days), loves heat (70-85°F), stunning color
Lion's Mane: Seafood-like texture, cognitive benefits, unique flavor
Black King Oyster: Thick meaty stems, aggressive cooking tolerance, premium presentation
Space and Time Requirements
Space needed: 12x8 inches of counter (smaller than a loaf of bread)
Daily time: 30-60 seconds (spray twice daily)
Weekly effort: 7 minutes total
No yard. No outdoor access. Studio apartments work fine.

Frequently Asked Questions
Q: How long until harvest? A: Blue oyster: 7-10 days. Pink oyster: 5-7 days. Lion's mane: 10-14 days. Black king oyster: 10-14 days.
Q: What equipment needed? ShroomBag includes everything, including a spray bottle and an instruction card.
Q: Year-round growing? A: Yes. Indoor temperature control means continuous production.
Q: Best for beginners? A: Blue or pink oyster ShroomBag. Incredibly forgiving, fast-growing.
Q: Multiple kits possible? A: 3-5 kits fit on standard shelving. Each is self-contained. Rotate for continuous harvests.
Why It Matters
ShroomBag from Maya Mushroom delivers incredible flavor you'll never find in stores, complete control over quality, and 60-80% cost savings. You're not just cultivating mushrooms. You're crafting restaurant-quality ingredients that transform ordinary dishes.

Your Beginner's Gourmet Mushroom Guide
Your Homegrown Path to Fresh Food, Flavor, and Food Freedom Mushrooms are more than ingredients. They are teachers, c...

The Complete Beginner's Guide to Growing Mushrooms at Home
Lion's Mane and Oyster Mushroom Grow Kits: Everything You Need to Know Before Your First Harvest There's something m...

The Gold Oyster Controversy: Why We Shouldn’t Be Growing It in North America
The Golden Oyster Mushroom (Pleurotus citrinopileatus) is stunning. Bright yellow caps, fast growth, and eye-catchin...

When to Harvest Your ShroomBag: Timing That Maximizes Yield
Harvest timing makes the difference between premium mushrooms and mediocre ones. Pick too early from your ShroomBag,...

Why Choose a Mushroom Grow Kit Today: The Maya Mushroom Advantage
Store-bought oyster mushrooms sit in plastic containers for days, losing flavor and texture before you even bring th...
Fresh. Simple. Delicious.

Fresh beats fancy
Simple ingredients. Big flavor.🍳

Brag-worthy meals
You Understood The Assignment. Show it off!📸

Comfort food, elevated
Cozy classics, leveled up.🥘

Mushroom Grow Kit | ShroomBag by Maya Mushroom
SINGLE PACK
One Mushroom Grow Kit. Every Month.
Pick your variety and go straight to growing. Every ShroomBag mushroom grow kit comes fully colonized on locally sourced Appalachian hardwood.
100% guaranteed. If your kit doesn't fruit, we replace it free or refund that month.
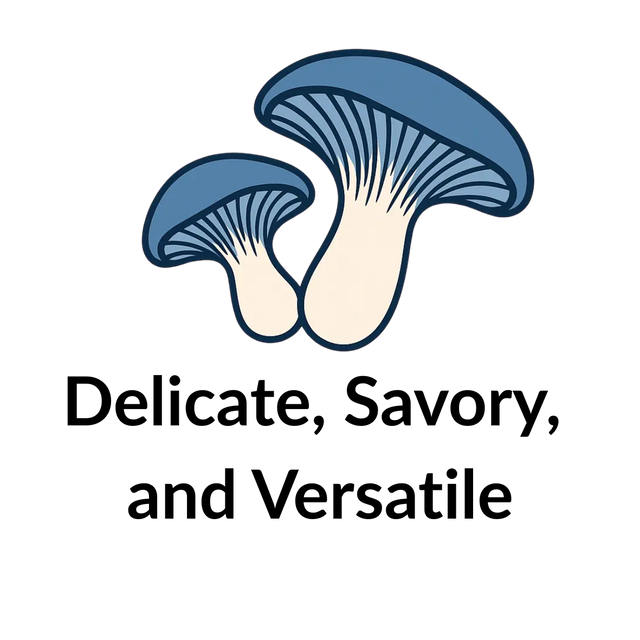
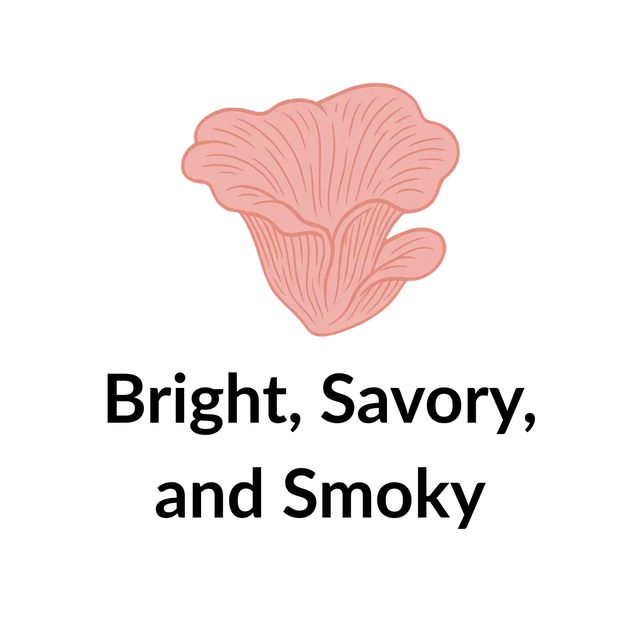
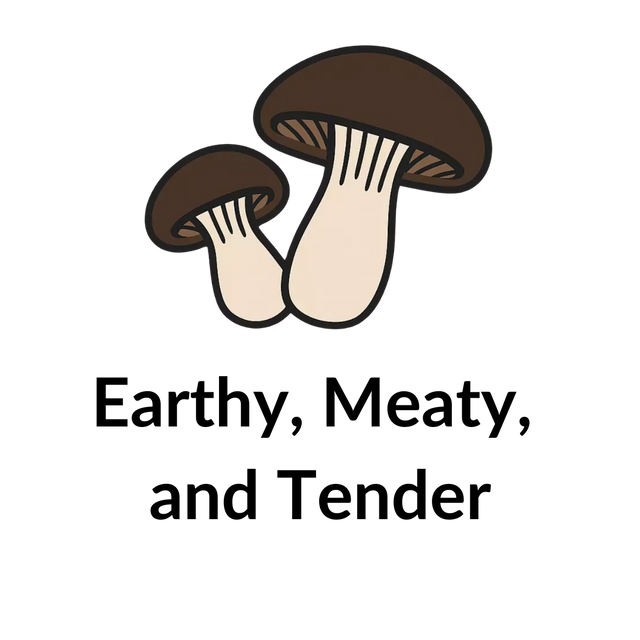
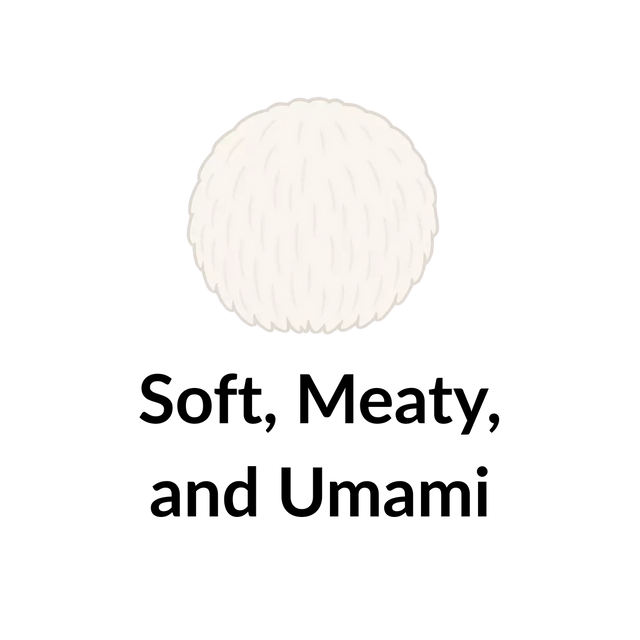
No setup, no sterilization, no guesswork. Choose your Lion's Mane mushroom grow kit for a seafood-texture harvest, a Blue Oyster mushroom grow kit for fast prolific harvests, a Pink Oyster mushroom grow kit for color and speed, a Chocolate Oyster mushroom grow kit for rich earthy flavor, or a Black King Oyster mushroom grow kit for thick meaty stems.
What You Get:
- 1 curated ShroomBag monthly
- Pick a different variety every month or stick with your favorite
- About 1.5lbs per kit (2 harvests)
- $27/month subscription (save 10% vs $30 one-time purchase)
- Cancel, pause, or skip anytime
This is the only mushroom grow kit subscription on the market that gives you the choice to actually pick your varieties! Pick from pink oyster, blue oyster, chocolate oyster, black king oyster, or lion's mane.
Who This Is For: Solo growers. Hobbyists. People who want fresh mushrooms monthly without thinking about it. Experimenters who like surprises.